 Skip to content
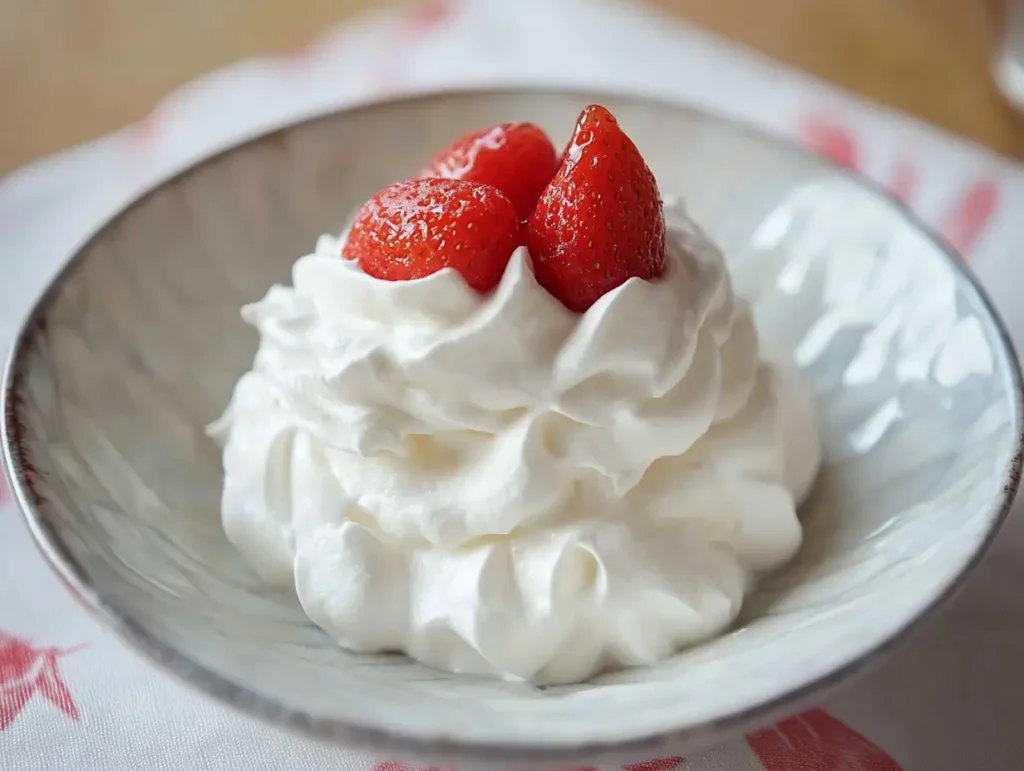
Whipped cream is that delightful, fluffy topping that takes desserts to the next level. Imagine adding a cloud of creamy goodness to your favorite cake, ice cream, or fresh fruit—sounds irresistible, right? While it might seem like something only found in a can, how to make whipped cream from scratch is surprisingly easy and much more delicious!
In just a few minutes, you can whip up your own fresh, creamy topping that’s not only better than store-bought versions but also customizable to your taste. Ready to impress your friends and family? Here’s how to make your own homemade whipped cream!
Table of Contents
Why Make This Recipe?
There’s something special about making whipped cream from scratch. First of all, it’s incredibly simple and takes just a few ingredients to make. Unlike store-bought whipped cream, which often contains stabilizers and preservatives, homemade whipped cream is made with fresh ingredients you can trust. Plus, you can control the sweetness and flavor, making it taste exactly how you like it. It’s a fun, quick way to elevate your desserts and can turn an ordinary dish into something extraordinary.
Another perk? It’s a fantastic way to impress guests, whether it’s for a family dinner, holiday dessert, or a casual get-together. Homemade whipped cream is just the kind of treat that shows you’ve gone the extra mile—without even breaking a sweat.

How to Make Whipped Cream
Making whipped cream at home is an incredibly easy process. With only a few basic ingredients and a little bit of time, you can create a decadent, light, and fluffy topping that’s perfect for all kinds of desserts.
Ingredients:
- 1 cup cold heavy whipping cream
- 1 to 2 tablespoons powdered sugar (adjust based on your sweetness preference)
- 1 teaspoon vanilla extract (or any other flavor you prefer)

Directions:
- Chill your tools: To get the best results when learning how to make whipped cream, start by chilling your mixing bowl and whisk or beaters. If you’re in a rush, pop them in the freezer for a few minutes. Cold equipment helps the cream whip faster and reach the right texture.
- Whip the cream: Pour the cold heavy whipping cream into the chilled bowl. If you’re using a hand whisk, start by whisking gently. If you have an electric mixer, start at a low speed to avoid splattering, then increase the speed as the cream begins to thicken. Keep whipping until the cream starts to form soft peaks. This means that when you lift your whisk out of the cream, it should hold its shape but still slightly fall over at the tips.
- Add powdered sugar: Once the cream has thickened, it’s time to add the powdered sugar. Sprinkle it in gradually, then continue whipping the cream. If you like your whipped cream a little sweeter, you can add more sugar to taste.
- Add flavorings: Once you’ve reached your desired thickness (usually after a minute or two of whipping), it’s time to add the vanilla extract. For a fun twist, you can experiment with other flavorings, like almond extract, peppermint extract, or even a bit of cocoa powder for a chocolatey variation.
- Check consistency: Keep whipping the cream until you’ve reached the desired consistency. If you want a thicker whipped cream that holds its shape well, continue until stiff peaks form. This means that when you lift the whisk, the whipped cream will stand up tall without falling over.
- Serve immediately: Now that you’ve learned how to make whipped cream, it’s best served right away while it’s fresh and fluffy. You can spoon it onto cakes, pies, fruit, or anything else that needs a bit of creaminess.
“How to Serve Whipped Cream: Tips for the Perfect Presentation”
Whipped cream can be used in so many creative ways! Here are just a few ideas for serving it:
- Classic topping: Dollop it on top of a slice of cake, pie, or cheesecake for that extra creamy touch.
- On ice cream: Serve it with your favorite ice cream or frozen yogurt for a dreamy combo.
- Fresh fruit: Pair it with fresh berries, banana slices, or tropical fruit for a light and satisfying dessert.
- Coffee or hot chocolate: Add a little whipped cream to your hot beverage for a luxurious finishing touch.
- Pancakes or waffles: Use it as a topping for breakfast or brunch alongside syrup, fruit, and nuts.
Whipped cream can transform any simple dish into something indulgent and special.
How to Store Whipped Cream
While it’s best to serve whipped cream fresh, if you have leftovers, storing it properly is key to keeping it fluffy and delicious. Here’s how:
- Refrigeration: Store any leftover whipped cream in an airtight container in the refrigerator. It will stay fresh for about 2-3 days. You may notice that it becomes a bit softer as it sits, but don’t worry; a quick whisking will bring it back to life!
- Re-whipping: If your whipped cream has softened too much in the fridge, simply re-whip it for a few seconds to get it back to a thick and airy consistency.
Tips for Making Perfect Whipped Cream
- Use cold ingredients: Cold cream whips better, so be sure to chill both your mixing bowl and beaters or whisk before you begin.
- Don’t over-whip: If you whip the cream too long, it can turn into butter. Keep an eye on it and stop once you’ve reached soft or stiff peaks.
- Customize sweetness: The amount of powdered sugar you add can be adjusted depending on how sweet you want your whipped cream to be. Start with a small amount and taste as you go.
- Try different flavors: Vanilla is a classic, but don’t be afraid to experiment! Add a little cinnamon, nutmeg, or cocoa powder for a seasonal twist, or try flavored extracts like hazelnut or maple for something unique.
Variations of Whipped Cream
Whipped cream is incredibly versatile, and you can easily modify the flavor or texture to suit your needs. Here are some fun variations to try:
- Chocolate whipped cream: Add a few tablespoons of cocoa powder or melted chocolate to the cream before whipping to create a chocolatey version.
- Cinnamon whipped cream: Stir in a teaspoon of cinnamon for a warm, spiced version that pairs beautifully with apple desserts or pumpkin pie.
- Berry-infused whipped cream: Mash some fresh berries and fold them into your whipped cream for a colorful and fruity version.
- Vegan whipped cream: If you’re following a dairy-free diet, use coconut cream or a non-dairy whipping cream substitute for a vegan option.
Frequently Asked Questions (FAQs)
Q: How do I know when my whipped cream is ready after learning how to make whipped cream?
A: Whipped cream is ready when it forms soft peaks (slightly bending over at the tips) or stiff peaks (standing upright). If it holds its shape but still looks smooth, you’re good to go!
Q: Can I use a different type of cream when learning how to make whipped cream?
A: Heavy cream or heavy whipping cream is best for whipping because it has a higher fat content. Light cream or half-and-half won’t whip up properly.
Q: How long can I store whipped cream after learning how to make whipped cream?
A: Whipped cream can be stored in the refrigerator for up to 2-3 days. For the best texture, re-whip it before serving.
Q: Can I make whipped cream ahead of time after learning how to make whipped cream?
A: Yes, you can prepare whipped cream ahead of time. Just store it in the fridge and give it a quick whip before serving if it softens.
Final Thoughts
Making whipped cream from scratch is easier than you might think, and the result is so much better than the store-bought versions. Whether you’re topping a dessert or enjoying it as a treat on its own, homemade whipped cream adds a touch of indulgence to any dish. With a little practice, you’ll be whipping up creamy, fluffy perfection every time. Now that you’ve learned how to make whipped cream, grab your mixing bowl, start whipping, and enjoy this simple yet satisfying treat!
